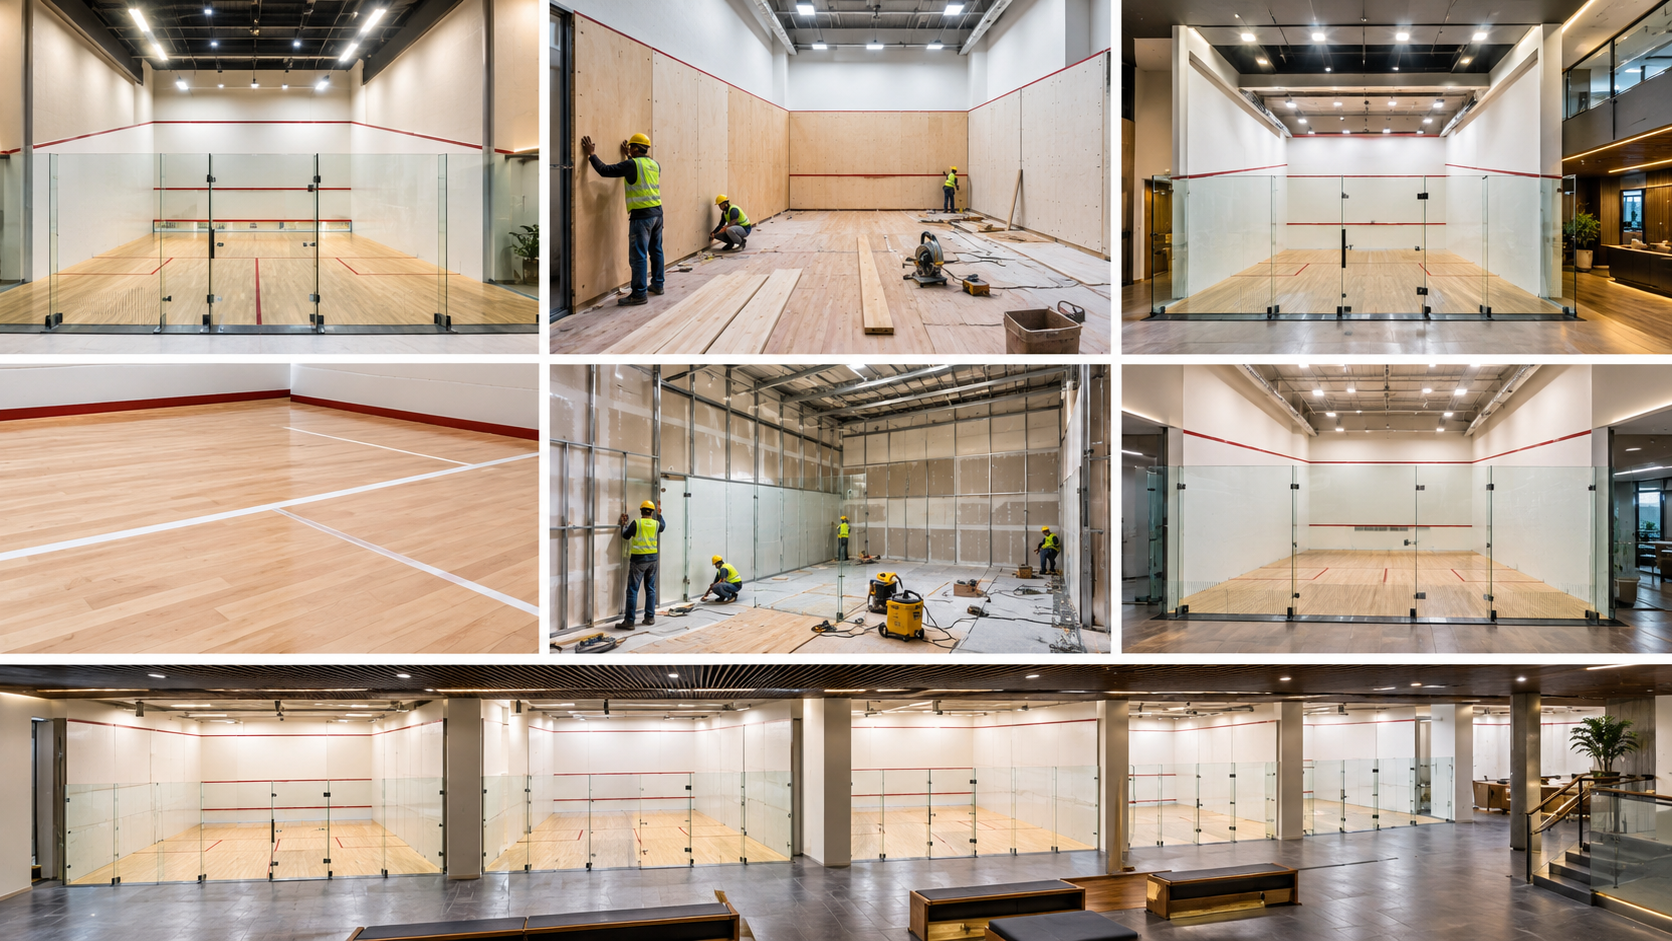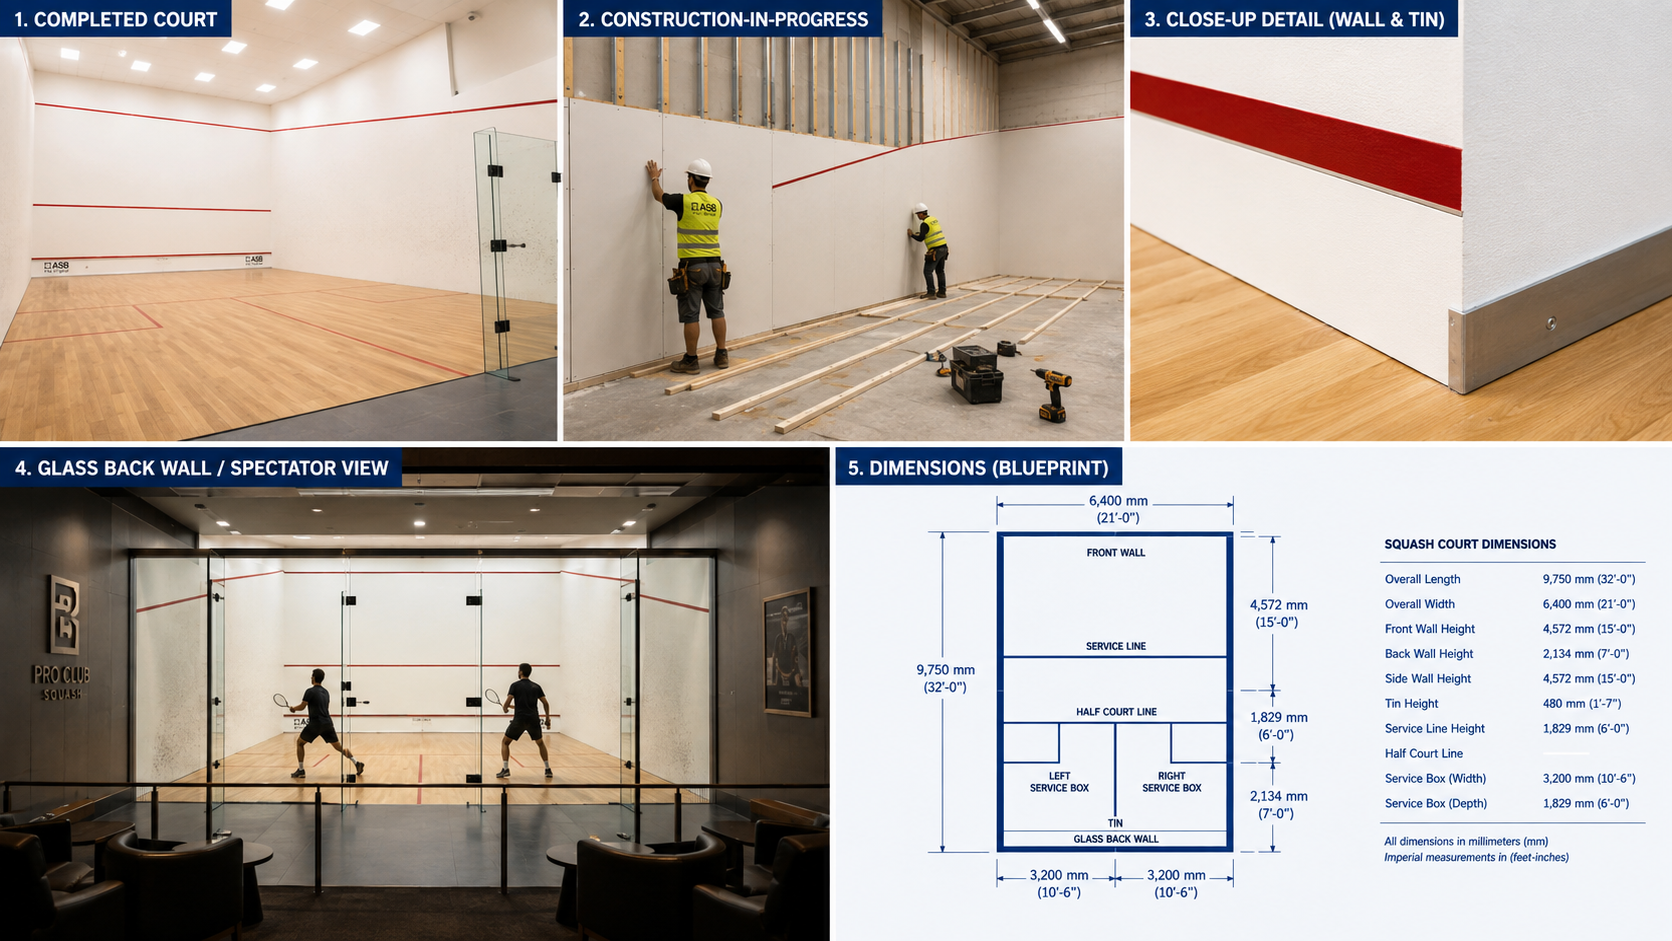

A squash court is more than four walls and a playing surface. It is a carefully engineered sports facility where flooring quality directly influences player movement, traction, comfort, safety, and overall playing performance. Since squash involves rapid acceleration, sudden stops, lunges, pivots, and continuous changes in direction, installing the right flooring system is essential for creating a professional playing environment.
Whether you are developing a squash court for a sports academy, school, university, residential club, fitness centre, or commercial sports complex, proper flooring installation plays a significant role in the court’s long-term performance.
However, successful squash court flooring installation involves much more than selecting wooden flooring and laying it across a concrete base. It requires proper site assessment, moisture evaluation, subfloor preparation, material selection, installation planning, finishing, and quality inspection.
In this comprehensive guide, we will explain the complete squash court flooring installation process, important technical considerations, common installation mistakes, maintenance requirements, and factors that influence the overall project cost.
1. Understanding the Importance of Squash Court Flooring
Squash is a high-intensity indoor sport that places continuous demands on the playing surface. Players frequently move across the court at different speeds while performing quick directional changes and aggressive footwork.
The flooring system must therefore provide a suitable balance of grip, shock absorption, stability, and durability.
A professionally installed squash court floor offers several benefits:
- Player safety: Appropriate surface traction helps reduce unwanted slipping during quick movements.
- Movement stability: A consistent playing surface supports controlled footwork, lunges, and directional changes.
- Impact management: A suitable flooring system helps manage the impact associated with repeated movement.
- Playing consistency: Uniform flooring conditions provide a more predictable playing experience.
- Long-term durability: Quality materials and correct installation help reduce premature wear and maintenance issues.
- Professional appearance: Proper finishing creates a clean, uniform, and visually appealing sports facility.
For these reasons, flooring should be considered an essential component of squash court construction rather than simply an interior finishing element.
2. Selecting the Right Squash Court Flooring Material
Before beginning installation, it is important to select a flooring material that meets the intended playing requirements, project budget, and maintenance expectations.
Traditional squash courts commonly use specialist timber sports flooring, although other engineered systems may be considered depending on the facility’s requirements.
A. Maple Wooden Flooring
Maple is a popular choice for indoor sports flooring because of its relatively uniform grain, hardness, and durability.
Its advantages include:
- Consistent playing characteristics.
- Smooth and uniform surface appearance.
- Good resistance to everyday sports-related wear.
- Professional finish when properly installed and maintained.
The timber must be appropriately graded, kiln-dried, and suitable for indoor sports applications.
B. Beech Wooden Flooring
Beech is another timber option used in indoor sports flooring systems. It offers a relatively uniform appearance and can provide a suitable playing surface when specified and installed correctly.
Its performance depends on timber quality, moisture content, construction details, and the complete flooring system.
C. Engineered Sports Flooring
Engineered flooring systems may be considered for projects requiring controlled dimensional stability and a specifically designed sports-floor construction.
Depending on the system, these floors may incorporate timber layers, resilient components, and specialist surface finishes.
The important consideration is that the complete system must be suitable for squash rather than simply being a general-purpose commercial floor.
Important: Not every wooden floor is suitable for squash. Flooring selection should consider sports performance, surface friction, resilience, dimensional stability, and applicable facility requirements.
3. Complete Squash Court Flooring Installation Process
A successful squash court flooring project requires a systematic installation approach. Each stage contributes to the performance, durability, and reliability of the finished surface.
Step 1: Site Inspection and Measurement
The first step is conducting a detailed site inspection.
Before ordering flooring materials or starting construction, the installation team should evaluate the available space and existing structural conditions.
Important inspection points include:
- Available court dimensions.
- Floor level and surface condition.
- Structural stability of the base.
- Moisture conditions.
- Ventilation and indoor environmental conditions.
- Access for transporting and storing materials.
- Wall and floor junctions.
- Provision for expansion and movement.
For a standard singles squash court, the internal playing dimensions are approximately 9.75 metres in length and 6.40 metres in width, with additional consideration required for wall thickness, surrounding construction, and access.
Accurate measurement helps prevent material wastage, installation complications, and dimensional errors.
Step 2: Subfloor Preparation
Subfloor preparation is one of the most important stages of squash court flooring installation.
Even premium-quality timber flooring cannot deliver consistent results if the base underneath is uneven, unstable, or affected by moisture.
The existing concrete or other approved structural base should be inspected for:
- Surface irregularities.
- Cracks and damaged areas.
- Uneven levels.
- Loose particles and construction debris.
- Moisture-related problems.
- Signs of water leakage.
Any identified defects must be addressed using appropriate repair and levelling methods.
The subfloor should be clean, stable, and sufficiently level according to the flooring manufacturer’s specifications.
Moisture testing is particularly important because excessive moisture can cause timber expansion, cupping, warping, and joint failure.
Step 3: Moisture Testing and Environmental Conditioning
Timber is a natural material that responds to changes in temperature and humidity.
If flooring is installed without checking environmental conditions, dimensional changes can occur after installation.
Before installation:
- Check the moisture condition of the subfloor using an appropriate testing method.
- Measure the moisture content of the timber.
- Ensure the building is properly enclosed and protected from external moisture.
- Stabilise indoor temperature and humidity conditions as recommended by the flooring manufacturer.
- Allow flooring materials to acclimatise where required by the specified system.
It is important to follow the manufacturer’s installation instructions rather than relying on a fixed acclimatisation period for every project.
Proper moisture management helps reduce the risk of flooring movement and premature damage.
Step 4: Installation of the Flooring Support System
Depending on the selected flooring design, the installation may involve a suitable support or subfloor system.
A traditional sports floor may incorporate resilient supports, battens, or another engineered construction that creates the required performance characteristics.
The installation team must ensure:
- Correct support spacing.
- Consistent floor height.
- Proper alignment.
- Secure fixing.
- Appropriate resilience.
- Suitable perimeter expansion provisions.
The support system should be designed for the intended flooring specification and expected usage.
An improperly installed support structure can lead to uneven loading, movement, noise, and inconsistent playing conditions.
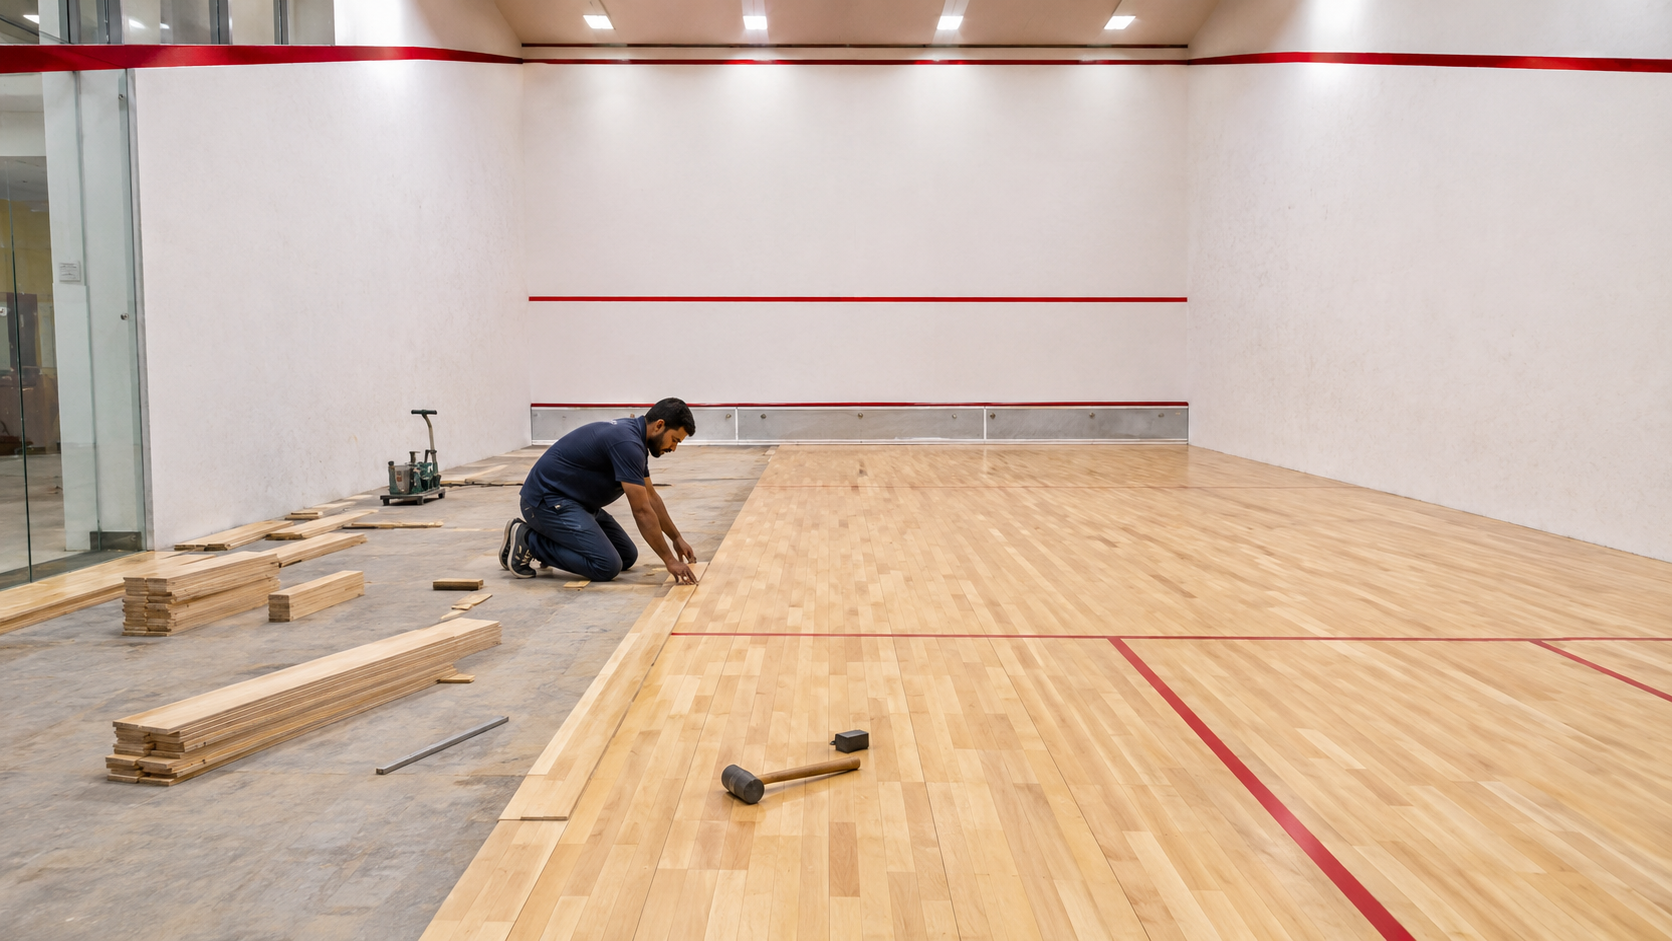
Step 5: Installing the Wooden Flooring
Once the base and support system are ready, the timber flooring installation can begin.
This stage requires careful alignment and consistent workmanship.
The process generally involves:
- Checking the timber boards for visible defects.
- Sorting and arranging boards according to the installation layout.
- Establishing the correct starting reference line.
- Installing boards in the specified direction.
- Maintaining appropriate joint arrangements.
- Fixing the boards using the approved installation method.
- Maintaining the required expansion gaps.
For traditional timber sports flooring, correct board alignment and joint consistency are especially important.
The installation team should continuously inspect the floor to identify gaps, uneven joints, movement, or alignment issues.
Step 6: Sanding and Surface Preparation
After installation, the wooden floor may require sanding to achieve a smooth and consistent surface.
Professional sanding helps address minor surface variations and prepares the timber for its protective coating.
The process generally includes:
- Initial sanding to remove unevenness.
- Intermediate sanding to improve surface uniformity.
- Fine sanding for final preparation.
- Cleaning and removal of sanding dust.
The objective is to achieve a uniform surface without creating excessive material removal or damaging the timber.
Specialist equipment and experienced operators are recommended for this stage.
Step 7: Applying the Sports Flooring Finish
The protective finish is an important part of the complete flooring system.
It protects the timber against everyday wear, supports easier cleaning, and contributes to the required surface characteristics.
The selected coating must be suitable for indoor sports flooring.
Important considerations include:
- Appropriate surface friction.
- Resistance to abrasion.
- Compatibility with the timber.
- Ease of maintenance.
- Drying and curing requirements.
- Compatibility with court markings.
The coating should be applied according to the manufacturer’s recommended preparation, application, and curing procedures.
A standard furniture polish or general-purpose decorative coating should not be substituted for a suitable sports-floor finish.
Step 8: Court Marking and Line Installation
After the flooring finish has been properly prepared, the playing lines can be installed.
Court markings help players identify playing boundaries and service areas.
For a standard squash court, the markings include:
- Short line.
- Half-court line.
- Service boxes.
- Other applicable playing boundary markings.
The dimensions and placement of markings should follow the applicable squash court rules and governing-body requirements.
High-quality line marking ensures visibility, accuracy, and a professional appearance.
Step 9: Final Quality Inspection
The final inspection determines whether the installed floor meets the project’s technical and performance requirements.
Before handing over the facility, the installation team should inspect:
- Surface level and uniformity.
- Board alignment and joint quality.
- Stability of the flooring.
- Surface finish consistency.
- Appropriate traction characteristics.
- Court marking accuracy.
- Expansion provisions.
- Signs of moisture-related damage.
- Overall workmanship.
Where required, testing should be carried out using appropriate equipment and recognised methods.
The court should only be opened for regular play after the coating has fully cured and the flooring system is ready for use.
4. Technical Factors That Influence Squash Court Flooring Performance
A professional squash court requires more than visually attractive flooring. Its technical characteristics must support the movement patterns and physical demands of the sport.
Surface Friction
The flooring should provide suitable traction for quick acceleration, stopping, and directional changes.
A surface that is excessively slippery can increase the risk of falls, while an unsuitable high-friction surface may restrict natural movement.
The objective is to achieve consistent, sports-appropriate surface friction.
Shock Absorption and Resilience
Squash players repeatedly perform lunges, jumps, and rapid movements.
A properly designed flooring system should provide suitable impact management and resilience without compromising stability.
Dimensional Stability
Timber flooring can expand and contract in response to environmental changes.
Proper timber selection, moisture control, installation detailing, and expansion allowances help minimise dimensional movement.
Surface Uniformity
Uneven flooring can affect foot placement and player confidence.
Consistent board alignment, level installation, and professional finishing are essential.
Durability
A squash court may experience frequent use throughout the day.
The flooring system should therefore be selected according to the expected intensity of use, maintenance capacity, and long-term operational requirements.
5. Common Mistakes to Avoid During Squash Court Flooring Installation
Even high-quality flooring materials can fail prematurely when installation practices are inadequate.
Some common mistakes include:
1. Ignoring Subfloor Moisture
Installing timber over a damp base can lead to expansion, deformation, and other moisture-related problems.
2. Using Unsuitable Flooring Materials
General-purpose wooden flooring may not provide the characteristics required for a specialist squash court.
3. Skipping Proper Levelling
An uneven subfloor can affect flooring stability and the overall playing experience.
4. Incorrect Installation of Support Components
Poor support spacing or inadequate fixing can cause unwanted movement and inconsistent floor behaviour.
5. Applying the Wrong Surface Coating
Decorative finishes may not provide the appropriate characteristics required for sports flooring.
6. Incorrect Court Markings
Incorrect dimensions or poorly positioned markings can affect the usability of the court.
7. Neglecting Environmental Conditions
Uncontrolled humidity, water leakage, and unsuitable indoor conditions can negatively affect timber performance.
Avoiding these mistakes helps improve installation quality and reduce future repair expenses.
6. Squash Court Flooring Maintenance Tips
Regular maintenance is essential for protecting the investment in a squash court.
Even a professionally installed flooring system requires appropriate care.
Here are some practical maintenance recommendations:
- Clean the surface regularly using a suitable microfiber mop.
- Use cleaning products approved for the flooring finish.
- Avoid excessive water during cleaning.
- Immediately address water spills and leakage.
- Maintain suitable indoor temperature and humidity conditions.
- Keep the court free from dust, sand, and abrasive particles.
- Inspect the surface periodically for scratches, gaps, and damaged boards.
- Avoid footwear that can damage or mark the playing surface.
- Schedule professional inspection and refinishing when required.
A planned maintenance programme helps preserve the flooring appearance, playing characteristics, and service life.
7. Factors Affecting Squash Court Flooring Installation Cost
The cost of squash court flooring installation depends on several technical and project-specific factors.
A fixed price cannot be determined accurately without understanding the site conditions and flooring specification.
Major cost components include:
Flooring Material: Timber species, grade, thickness, and overall system specification influence material costs.
Subfloor Condition: Additional levelling, repairs, moisture treatment, or structural preparation may increase the project budget.
Installation System: The choice between different engineered flooring constructions affects material and labour requirements.
Surface Finishing: Sanding, protective coating, and specialist sports-floor finishes contribute to the overall cost.
Court Marking: Accurate line marking and finishing add to the installation scope.
Site Location: Transportation, material availability, labour rates, and project accessibility can influence the final quotation.
Project Size and Complexity: Court dimensions, site conditions, and construction requirements determine the quantity of materials and installation effort.
For accurate budgeting, it is advisable to request a site inspection and a detailed quotation covering materials, installation, finishing, and quality checks.
8. Why Professional Squash Court Flooring Installation Matters
Squash court flooring is a specialist sports infrastructure component. Its installation requires technical knowledge, appropriate materials, and experienced execution.
Working with a professional sports flooring contractor can help ensure:
- Correct material selection.
- Proper site assessment.
- Appropriate subfloor preparation.
- Accurate installation.
- Professional surface finishing.
- Correct court markings.
- Quality inspection.
- Long-term maintenance guidance.
A coordinated approach also helps ensure that flooring installation integrates properly with the overall squash court construction process.
Whether the project involves a single squash court or a complete indoor sports facility, professional planning and execution can make a significant difference to the final outcome.
9. Final Thoughts
Squash court flooring installation is a technical process that directly influences player safety, comfort, playing consistency, and facility durability.
From site inspection and moisture testing to subfloor preparation, timber installation, sanding, surface finishing, and final inspection, every stage must be completed with attention to detail.
Choosing the right flooring material is important, but the quality of installation is equally essential.
For schools, sports academies, residential developments, fitness centres, and commercial sports facilities, investing in a properly engineered squash court flooring system helps create a reliable and professional playing environment.
A well-planned installation today can contribute to better facility performance and more manageable maintenance requirements in the years ahead.
Frequently Asked Questions (FAQs)
1. Which flooring is best for a squash court?
Specialist timber sports flooring, including suitable maple or beech systems, is a traditional choice for squash courts. The final selection should depend on the required playing characteristics, project specification, and applicable sports facility standards.
2. How long does squash court flooring installation take?
The installation timeline depends on the court size, subfloor condition, flooring system, environmental conditions, and finishing requirements. Site preparation, material acclimatisation, installation, coating, and curing must all be included in the project schedule.
3. Can regular wooden flooring be used for a squash court?
Not all regular wooden flooring is suitable for squash. A specialist sports flooring system should be selected based on surface friction, stability, resilience, durability, and intended sports use.
4. Why is subfloor preparation important?
Subfloor preparation provides a stable and level foundation for the flooring system. It helps prevent unevenness, unwanted movement, and moisture-related flooring problems.
5. Does squash court flooring require regular maintenance?
Yes. Regular cleaning, moisture control, surface inspection, and periodic professional maintenance help preserve flooring quality and playing characteristics.
6. What affects the cost of squash court flooring installation?
Material selection, subfloor preparation, installation method, surface finishing, court markings, transportation, and project complexity are the main factors influencing installation costs.
7. How can I prevent moisture damage to squash court flooring?
Use an appropriately tested and prepared subfloor, control indoor humidity, address water leakage immediately, and follow the flooring manufacturer’s moisture-management recommendations.
8. Is professional installation necessary for a squash court?
Professional installation is strongly recommended because squash flooring requires appropriate material selection, accurate installation, sports-specific finishing, and quality control.
9. What should be checked before handing over a squash court?
Inspect floor uniformity, stability, surface finish, board alignment, court markings, expansion provisions, and compliance with the project’s technical specifications before opening the court for play.
10. Can squash court flooring be renovated instead of replaced?
In some cases, existing timber sports flooring can be restored through professional sanding, refinishing, or local repairs. However, replacement may be necessary when there is significant structural damage, moisture deterioration, or failure of the underlying flooring system.